Bokeh Effect
1. Create a new canvas (1600 x 1200 px)
2. Create a new layer – make sure there is no color for the background
3. Hide the background layer by clicking on the eye next to the layer to make it not visible
4. Make sure the foreground and background colors are the default
5. Click on the elipse tool on the tools panel
6. On the options bar: select the “fill pixels” button
7. Create a circle in the middle of the canvas – hold down the shift key (for perfect circle) and then click and drag across the canvas
8. Change the “Fill” setting n the layers panel to 50%
9. Click on layer effects – the “fx” button on the layers panel
o Click “Blending Options”
§ Go to the Stroke settings
· Change the size to 8 px
· Change the position to “Inside”
10. Click Ok to exit and apply the settings
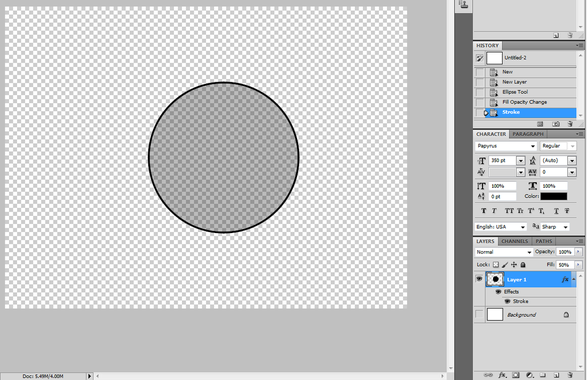
11. Click on the layer 1 thumbnail while holding down the Control key – this will select the circle on that layer
12. Click on the Edit Menu
o Go to Define Brush Preset
§ Change the brush name to Bokeh
13. Delete Layer 1
14. Deselect the selected area – Select Menu > Deselect (Ctrl+D)
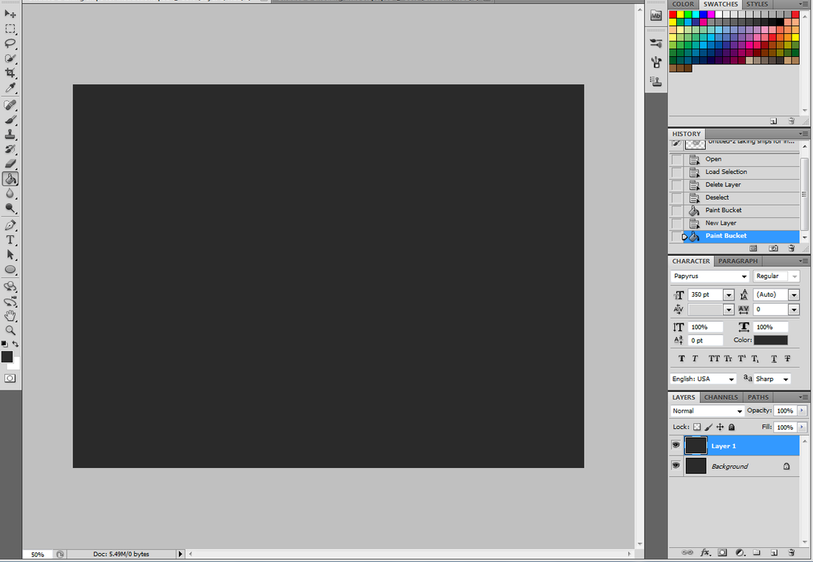
15. Fill the background with dark gray
o Click the paint bucket tool
o Click the foreground color (should be black at this time)
o Change it to Dark Gray = #2a2a2a
16. Create a new layer
17. Fill that layer with the same color – click the canvas with the same paint bucket from before
12. Click on the Edit Menu
o Go to Define Brush Preset
§ Change the brush name to Bokeh
13. Delete Layer 1
14. Deselect the selected area – Select Menu > Deselect (Ctrl+D)
15. Fill the background with dark gray
o Click the paint bucket tool
o Click the foreground color (should be black at this time)
o Change it to Dark Gray = #2a2a2a
16. Create a new layer
17. Fill that layer with the same color – click the canvas with the same paint bucket from before
18. Rename the layer to “Gradient” – Double-click the name “Layer 1”
19. Right-click on the Gradient layer and then click on “Blending Options”
o Click on “Gradient Overlay” – the box should be checked and the box the text is in should be blue
o Click on the box with the drop down menu next to the word “Gradient”
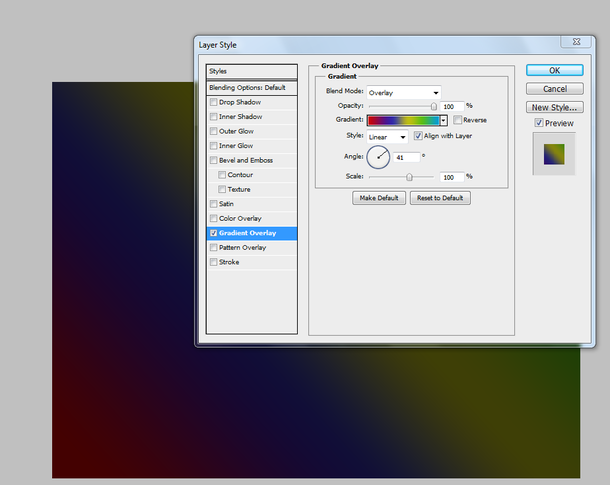
19. Right-click on the Gradient layer and then click on “Blending Options”
o Click on “Gradient Overlay” – the box should be checked and the box the text is in should be blue
o Click on the box with the drop down menu next to the word “Gradient”

o Customize your colors
§ To create new stops for more colors: Hold the ALT key and drag a stop (box with the triangle on top)
§ To create new stops for more colors: Hold the ALT key and drag a stop (box with the triangle on top)
- Click on the stop that you would like to change the color of
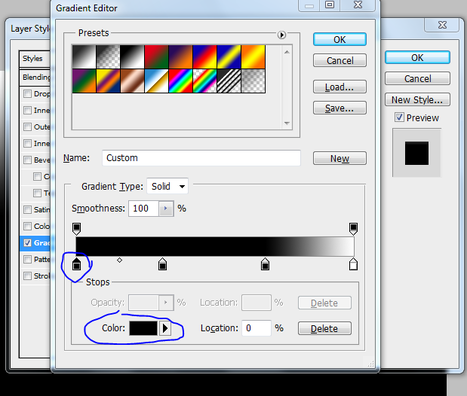
· Click on the drop down box that says “Color” next to it in the Stop options – choose the color of your choice (not too dark, not too light)
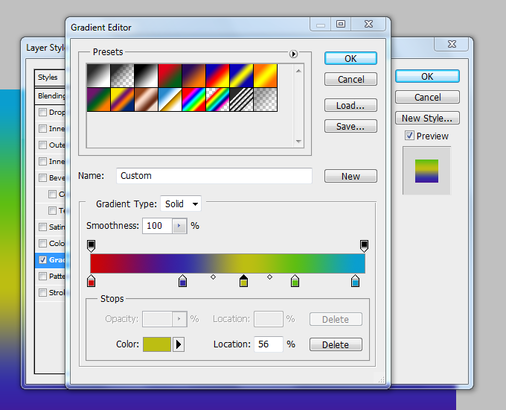
· Click Ok when the colors are what you want
20. Change the “Angle” setting to 41%
21. Change the “Blend Mode” to “Overlay” then click Ok
20. Change the “Angle” setting to 41%
21. Change the “Blend Mode” to “Overlay” then click Ok
22. Create a new “Group” on the Layers Panel – click the folder button on the bottom of the layers panel
23. Rename “Group 1” to “Bokeh Layers”
24. Change the setting on the Layers Panel with the drop down menu to “Color Dodge”
23. Rename “Group 1” to “Bokeh Layers”
24. Change the setting on the Layers Panel with the drop down menu to “Color Dodge”

25. Create a new Layer in the Group named “Bokeh Layers”
26. Click on the “Brush Tool” on the Tools Panel
o Select the brush that was previously made, named “Bokeh” – should be at the end of the list of brushes
o Change the size to make the brush smaller – 350 should be sufficient (change on the options bar)
o Change the color of the brush to white – change the foreground color to white
27. Open the “Brush Panel” – Window Menu > Brush
o Make sure all of the following settings have the box checked next to them to apply the settings (Brush Tip Shape, Shape Dynamics, Scattering, and Transfer)
o Brush Tip Shape Settings:
§ Angle = 0
§ Roundness = 100%
§ Change Spacing = 200%
o Shape Dynamics Settings:
§ Change Size Jitter = 100%
§ Control = Pen Pressure
§ Change Minimum Diameter = 50%
§ Angle Jitter = 0% ; Control = off
§ Roundness Jitter = 0% ; Control = off
o Scattering Settings:
§ Scatter = 1000%
§ Control = off
§ Count = 5
§ Count Jitter = 0% ; Control = off
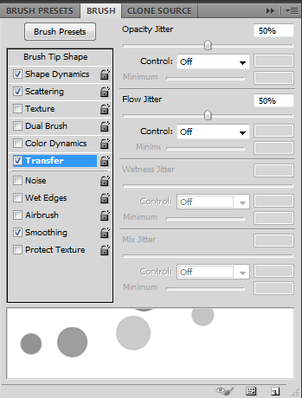
o Transfer Settings:
§ Opacity Jitter = 50% ; Control = off
§ Flow Jitter = 50% ; Control = off
26. Click on the “Brush Tool” on the Tools Panel
o Select the brush that was previously made, named “Bokeh” – should be at the end of the list of brushes
o Change the size to make the brush smaller – 350 should be sufficient (change on the options bar)
o Change the color of the brush to white – change the foreground color to white
27. Open the “Brush Panel” – Window Menu > Brush
o Make sure all of the following settings have the box checked next to them to apply the settings (Brush Tip Shape, Shape Dynamics, Scattering, and Transfer)
o Brush Tip Shape Settings:
§ Angle = 0
§ Roundness = 100%
§ Change Spacing = 200%
o Shape Dynamics Settings:
§ Change Size Jitter = 100%
§ Control = Pen Pressure
§ Change Minimum Diameter = 50%
§ Angle Jitter = 0% ; Control = off
§ Roundness Jitter = 0% ; Control = off
o Scattering Settings:
§ Scatter = 1000%
§ Control = off
§ Count = 5
§ Count Jitter = 0% ; Control = off
o Transfer Settings:
§ Opacity Jitter = 50% ; Control = off
§ Flow Jitter = 50% ; Control = off
28. Hide the Brush Panel – Same way as you opened it
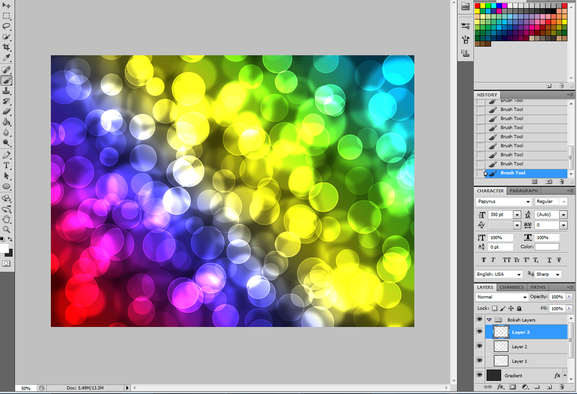
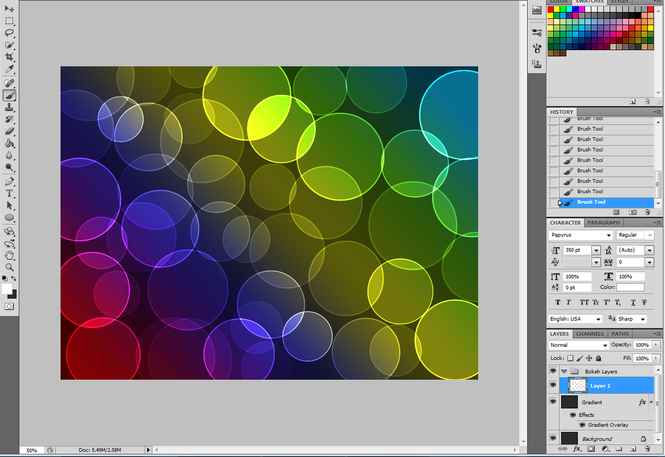
29. Create dots all over your colorful canvas by clicking – (Notice the size changes) You can create multiple dots at a time by clicking and dragging across the canvas
o Fill the canvas with many dots but leave some space (Don’t get carried away)
29. Create dots all over your colorful canvas by clicking – (Notice the size changes) You can create multiple dots at a time by clicking and dragging across the canvas
o Fill the canvas with many dots but leave some space (Don’t get carried away)
** IF your image is too dark (mine is not) then you can brighten it. Image Menu > Adjustments > Brightness/Contrast > Move the sliders as desired and then do the same to the background layer
*Click back on “Layer 1” after fixing the brightness
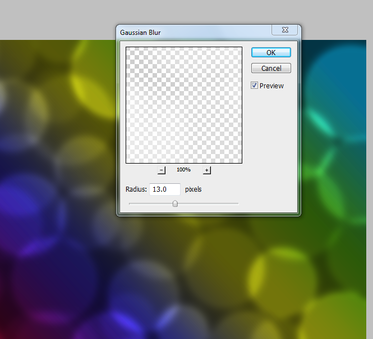
30. Blur the first Layer
o Filter Menu > Blur > Gaussian Blur > 13.0 > OK
*Click back on “Layer 1” after fixing the brightness
30. Blur the first Layer
o Filter Menu > Blur > Gaussian Blur > 13.0 > OK
31. Create a new layer in the “Bokeh Layers” Group – click the new layer button while on Layer 1
32. Change the size of your brush to make it smaller – 225 is sufficient
33. Create the dots with the smaller brush on Layer 2
34. Blur Layer 2 when you are finished creating the dots on Layer 2
o Filter Menu > Blur > Gaussian Blur > 7.0 > OK
35. Create a third layer in the “Bokeh Layers” Group
36. Change the brush size to a smaller size – 150
37. Create dots with the smaller brush on Layer 3
38. Your Bokeh masterpiece is finished!